With sun finally starting to show itself more often than not, you’re probably starting to spend more of your time in your outdoor living areas. Don’t let the fun stop in the evenings just because your outdoor lighting is ineffective.
With more lighting choice than, it can be overwhelming to know where to start. An effective outdoor lighting plan can be easier than you think if you follow some basic principles.
We’ve created a quick checklist to help you guide you through the lighting choices, and things to consider when planning your outdoor lighting.
1 - Creating Atmosphere
Firstly, start by asking yourself how you want to use your outdoor space. Not all outdoor lighting is created the same. To create ambience in a space, is all about using the right type of lighting fixture to suit your outdoor space.
Lighting is generally divided into three layers based on their function.
-
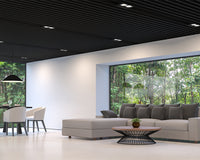
Ambient lighting; which provides illumination for a whole room or space.
-
Task lighting; is used to allow you to perform a specific task or used for a specific purpose, such as to light a path or step.
-
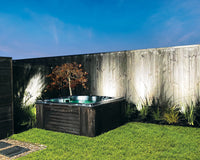
Accent lighting; is used to draw attention to an object or area which is usually achieved with spotlights or floodlight type fittings.
2 - More is not always better
More is not always more in lighting, too much lighting can be overwhelming, create glare and be all-round uncomfortable, which is not what you are wanting to achieve in your relaxation space.
Understanding how many lights to fit into a space can be challenging as it depends what you are doing with your outdoor space. As a rule of thumb though less is generally more.
It is also important to consider your neighbours when designing your outdoor lighting. Light that overflows into your neighbours can create unnecessary conflict.
Lighting these days is mostly produced with LED technology, primarily due to the power cost savings associated to the technology. An LED fittings brightness is determined is via their Lumen output. The higher the lumens the brighter your fixture will be.
Here is our view on where to start with outdoor lighting:
-
Path lighting: 100 - 400 lumens
-
Driveway Lighting: 500+ lumens
-
Step lights: 50 - 200 lumens
-
Flood lights: 900 - 2000 lumens
-
Wall Lights: 300 - 500
-
Spotlights: 150 - 900 Lumens
Expert tip for light pollution:
-
Aim lights carefully. Position lights at night and check their position frequently.
-
Shield bulbs. Use fixtures that have reflectors and shielding to concentrate light where you want it.
-
Control the light. Separately zoned lights with timers, controls, dimmers, or motion sensors will turn on lights only when needed or enable them to be turned down as necessary.
3 - Selecting Colour Temperature
LED lighting technology offers you many choices in colour temperature and brightness.
Measured in degrees Kelvin (K). Lower colour temperatures produce a warmer yellow/orange colour output, while higher temperatures produce a cooler, whiter light.
Outdoor lighting colour temperatures should range between 2500k-4000k, as a basic rule of thumb. On architectural elements use warmer colour temperatures (between 2500k-3000k) and on plant and landscape areas use slightly cooler temperatures are (3000k-4000k).
Expert Tip for colour temperature:
- Lighting Trees: When using downlighting from high up into vegetation such as trees, 4000k is best, as it mimics the colour of moonlight making the lighting appear more natural.
- Lighting Flower Beds: When lighting a large flower bed or other planting areas in the garden, it is better to use several smaller lights rather than a single large unit. This creates a series of softly overlapping pools of light that are free of harsh glare in the centre.
4 - Fit for Purpose Lighting
All outdoor light fittings come with an ingress protection rating (IP Rating) which rates the fittings suitability for the environment that it intended to be installed.
This rating is marked by the letters “IP” followed by 2 digits. The first digit indicates the level of protection against ingress of solid objects and the second relates to waterproofing. This advice may help when selecting your fittings suitability for placement.
The minimum IP rating you should look for in a garden light is IP54, which protects against rain or spraying water at a 60° angle from vertical.
Decking or patio lights are often jet-cleaned, which requires an IP65 rating or above. IP65 is a good target, as it indicates a dust-tight housing as well as resistance to jets of water.
Lights to be installed in shallow water up to 1m deep require a rating of IP67.
If installing lights at depths of over 1m in ponds or swimming pools, opt for a fitting with an IP68 rating.
Expert Tip for IP rating
- Always check the manufacturer’s information before installation, IP rating can be voided if installed incorrectly.
5 - Right Light, Right Place:
When designing your lighting placement, some areas are an absolute must with outdoors
Driveway: bollards and pole lighting are a great way to light up long driveways, providing illumination for drivers. Ensure the light is directed towards the ground as to not shine into drivers’ eyes.
Paths: Having paths well-lit make your entrance look welcoming, extending hospitality to visitors and makes walking more secure. Ensure path lighting is illuminating away from eyes to prevent glare. Consider up-lighters with an asymmetric lens & directional spotlights.
Entries: Lighting should be placed on each side of a door or overhead. Remember to light up all entrance: front, back, and side entry doors. Consider downlights & exterior rated wall lights.
Decks or Patios: Lighting can be used to illuminate specific task areas on a deck or patio, such as a BBQ area, steps & railing areas. Uplighting can be used on a deck or patio to send light upward on an umbrella or deck "ceiling" for an indirect effect. Consider deck up-lighters, exterior strip lighting for under benches or steps or specific step lights.
Expert Tip for selecting the right light.
- Safety Spaces: These are areas that have the potential to injure or harm. Look for edges between surfaces, like the edge of a patio and lawn, and spaces where heights change, such as stairs, decks and the like.
- Security Spaces: These are spaces where you want to ensure that nobody is going to mess with your home. Front and back doors, side yards, driveways and mailboxes are all areas to consider.
Eurotech Lighting is a local NZ family-owned business, who have been producing lights for Kiwis for over 53 years. We have a showroom onsite and a team of lighting experts who are always available for lighting advice. To get hold of the team, email us on: info@eurotechlighting.co.nz or phone us on: 09 818 6039.


